I’m a little late in writing this since most of the hardware arrived last Friday, January 23rd, but better now than never…
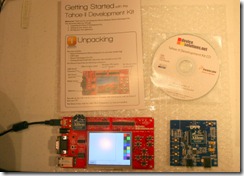
 From Microsoft, I received my development kit for the Dare to Dream Different Challenge. Included in the kit was the Device Solutions Tahoe-II board with an XBee chip, a USB XBee development board, a one page “Getting Started” pamphlet and a disk with the Tahoe-II SDK on it. I wasn’t expecting the USB XBee development board and it was a nice surprise since I had already decided on XBee as my communications technology. I already have an idea on how to utilize this board.
So far, I’ve run several sample programs through the Tahoe-II and am very impressed with how responsive it is and how easy Visual Studio 2008 makes it to develop for this board. The real challenge it seems at this point is going to be figuring out how to communicate using XBee. Although the board has support for XBee, I’ve found that the .net Micro Framework 3.0 does not yet have this support. Fortunately, Michael Schwartz has an open source project on CodePlex that appears to make working with XBee somewhat trivial. I do wish there was more documentation and sample code available.
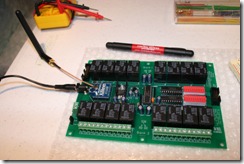
 Since I am also going to need a relay board, I decided on the ZUXPSR1610ProXR 16-channel 10 amp Zigbee (XBee) relay board by National Control Devices. Since I haven’t figured out exactly what my relay requirements are going to be yet, I went ahead with this one. It’ll probably have more relays than I need and will certainly handle more current, but I thought that might come in handy after the competition when I decide to use it for other projects. There is no documentation that came with this board. However, I presume that switching the relays will basically be the same was communication with the GPIO ports on the Tahoe-II. I ordered the board with an external antenna since my plan is to eventually house this board in a project box.
The board operates on a 12V DC power supply which happens to be a big bonus for me since I designed the circuitry for the LEDs on the mock yard to be powered by 12V DC. The board has a set of terminals where I can run the 12V power off of it. This is great since it means that I will not have to use two power supplies (one for the board and one for the mock yard). Something isn’t quite the same as that of the power supply I had been using to build the mock yard with and I’ve discovered that my green LEDs do not shine very brightly when powered from the board. I’ll have to go back and replace the resistors on the green zone circuit to some with lower resistance. I’ll do this later on after I have the software working. As long as the circuit is working well enough for me to tell that the relays are working, I’ll be fine with it for now.
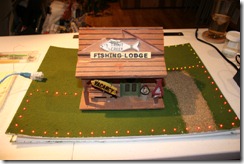
 Speaking of the mock yard… I put the finishing touches on it earlier this week. I used some model train supplies I picked up at Hobby Lobby to decorate the foam board with “grass” and a gravel driveway. Unfortunately, the application of watered down glue used to adhere the “grass” also has caused my foam board to bow up. This is very frustrating. I’m thinking that if I spray some water to the bottom side of the board that it may equalize out the shrinkage and cause it to straighten out. I will also be replacing the bottom piece of foam board with a piece of 1/4” acrylic Plexiglas. This will allow the circuitry to be easily viewed. I’ll probably also screw down the sides of the foam board to the Plexiglas to force it to lay flat. Again, these are all projects that will have to wait until later when everything is functional. Like the old bird house I found in the garage? :)
Also, notice that I ran all of the lead wires for the LED circuits to an RJ45 plug mounted on the side of the foam board. This will make it much easier to separate the parts for transportation when I have to go to Redmond to demonstrate the project for Round 3 ;) Since I only need three pairs of wires for my three zones and the RJ45 port allows for four pairs, I went ahead and ran a pair of wires under the house that I can use to do some yet undetermined very cool thing with on the house. Any ideas?
Well, now the real fun has begun. The task of learning the .net micro Framework and XBee. Since I don’t really plan to disclose all the details of my development from here out until after the competition is over, I’m not really sure how often updates will continue to be posted here on the blog. I’m sure there will be some screen shots. So, stay tuned.

0 comments:
Post a Comment